

Begin your tutorial putting the end result in focus. When you initially show viewers the finished object or ability, interest is piqued and they desire the sequence leading up to it. This is the time rewind instruction, display the endpoint, then rewind and detail the journey. Employing a video reverser within Pippit allows you to make the first reveal easy, then flip to a clean forward tutorial that comes across as new and deliberate. Start with an understandable finished frame, and vow the learners a functional road map back to the last shot, so they feel rewarded for their patience.
Why rewind hooks learners
Reverse order provides learners with a concise, gratifying hook. Rather than waiting for payoff, they witness success first and remain to gather the clues. This primes pattern recognition: viewers are mapping process backward in their minds, which enhances recall when you subsequently illustrate forward. It serves social formats as well, an interesting outcome captures the attention and persuades skimming scrollers to remain for the how to. Intros work particularly well for visually dramatic outcomes or clean end states that read at a glance.
Plan forward, perform backward
Create the lesson in ordinary order first. Mark each critical move, choice, and measurement. Reverse the beats for the opening reveal and check if each reverse step redefines the previous frame. The reversed intro must be short: a single interesting shot that reads immediately. Utilize the rewind as a promise; the forward part must deliver on that promise with intentful, repeatable actions and clear measurements. Cut it if a beat doesn’t alter understanding. Keep the lesson lean.
Edit like a teacher
The edit is your lesson plan. In the introduction, condense time to a single magnetic moment. To teach, stretch time only where students require it, and constrict routine procedures. Title clips by purpose and mark causal markers, so iteration is quick. For cutting hesitations and constricting pace, a trusty video cutter like Pippit’s cuts dead air and keeps the lesson streamlined. Include visual callouts, arrows, zoom-ins, and brief annotations, to point out precise hand positioning or tool orientation so that learners can replicate the motion accurately.
Short formats and templates
Produce a 30-second highlight that starts with the final result and then displays three micro steps in forward sequence for social streams. For longer lessons, utilize a ten-second reverse flourish followed by a ten-minute breakdown with timestamps. Construct modular templates where a module is a micro lesson; this allows you to reuse material for email classes, apps, or pay-to-play workshops without redoing the reveal. Templates speed up production and maintain brand instruction consistency.
Practice loops and testing
Add loopable portions for practice. After illustrating a difficult movement, loop it at slower speed with on-screen counts to promote practice. Provide checkpoints where students attempt the movement and then see how it compares to the complete frame illustrated at the beginning. These formative tests allow students to self-evaluate and go back to specific clips rather than re-watch the entire lesson, which maximizes effective practice time.
Flip it in Pippit: three fun steps
Step 1: Upload your video
Create an account at Pippit and open Video generator and click on Video editor. The new video editor window will be displayed. Go with the Media option and click on the Upload button to upload a file or folder containing your videos. If your video has been uploaded, now it’s the time to edit the video and create it in reverse mode using Pippit.
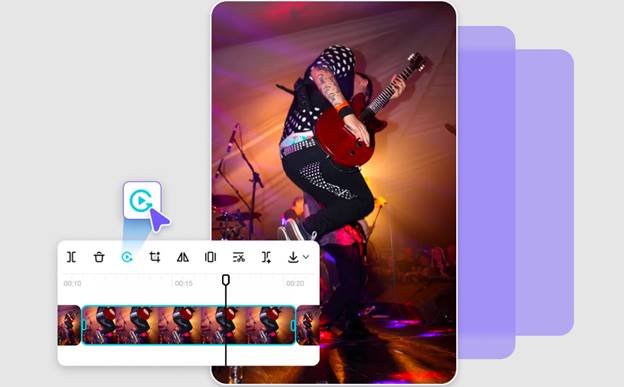
Step 2: Reverse video clip
Once you have uploaded your video, press the Reverse button in the bottom right toolbar, and the video will be reversed for you. You may also add various elements and transitions after reversing the video. The Speed feature can be used to adjust the speed and pitch of your video for a personalized effect. Moreover, the Remove Background and Animation tools assist in creating amazing visual effects.
Step 3: Export your video
Preview your video to make sure everything is just right. If necessary, finalize edits before exporting. Satisfied, click Export and choose Publish or Download to distribute on sites like TikTok, Instagram, or Facebook or save it directly to your device. Fine-tune the final settings and click Export to deliver your reverse video.
Visual rules that teach
Employ steady framing, consistent lighting, and close-ups when accuracy is key. Match cuts and motion anchors smooth the transition from the reversed reveal to forward instruction. If you rely on photographs or diagrams to explain variants, bring them to life with image to video features by Pippit, so stills feel combined with motion. Maintain color and size consistency between shots, so the brain processes each cut as the same object being moved around, and use plain, repeatable camera placement to minimize cognitive load.
Sound, pacing, and repeatability
Sound bridges action to feel. Add tactile foley, shirt rustle, tool click, or brush stroke, so students learn the sensory signature of every motion. Select music that lifts the reveal and then pulls back on instruction. Space the forward lesson with purposeful waits after key actions, and include short practice loops where students can replay complex motions at slower speed. Utilize captions for tool names, measurements, and tempo cues so that learners can track without constantly replaying.
Common errors and fixes
Steer clear of too busy an opener; the completed frame has to be readable immediately. Do not edit out context learners require; occasionally a longer clip, ever so slightly longer, helps more than a jump-cut edit. Test on beginners: if they don’t describe the forward sequence after seeing the reversed intro plus your lesson, simplify. Break checkpoints into actionable moments using seconds, hand position, and tool angles instead of general advice.
Close and call to action
Time rewind tutorials convert passive watching to active learning by revealing the outcome first and then instructing the way to achieve it. They enhance rewatch value and render practice more focused. With Pippit, you can make the reveal, design clear forward lessons, and export refined tutorials fast. Ready to instruct with wonder. Open Pippit, flip your reveal, publish a tutorial that assists viewers in learning quicker.
